
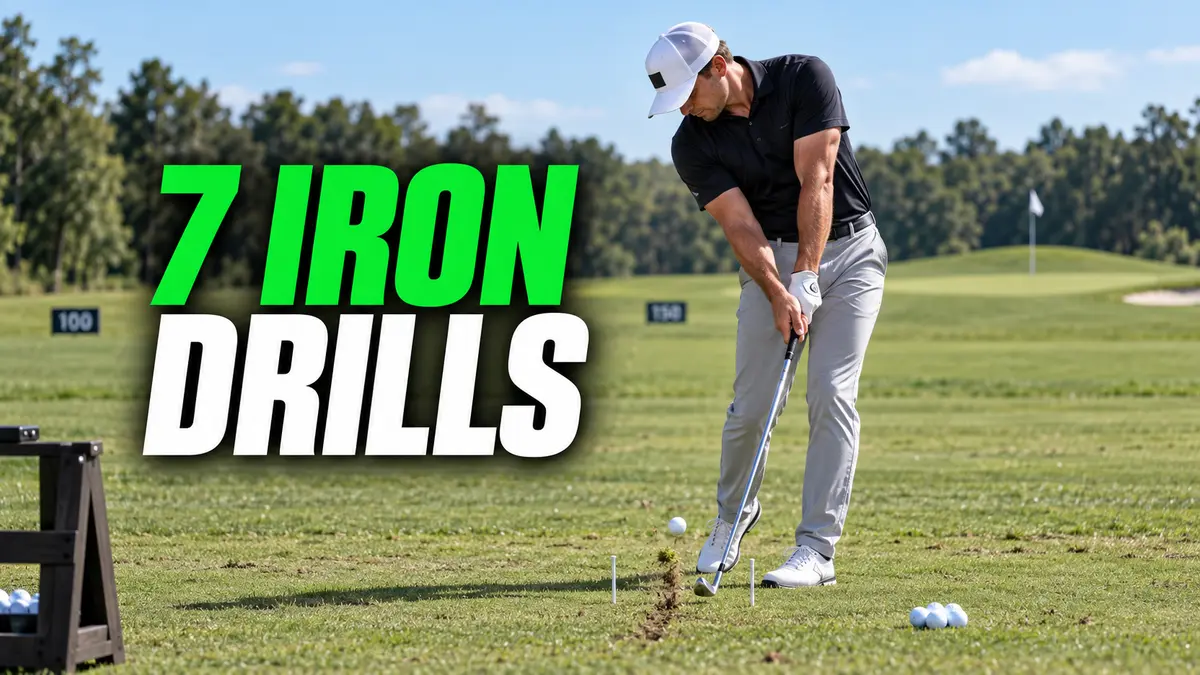
7 Iron Drills for Better Contact and Accuracy
Most golfers do not need another hour of hitting 7-irons toward the same flag. They need feedback that tells them whether the problem is contact, setup, swing control or target performance.
That is how I organize iron practice. Instead of trying to fix everything with one swing thought, I use drills that isolate one skill and give the golfer a clear success standard.
Three of these drills have been especially useful in my own game and coaching. The tee-gate drill helps students recognize heel contact, which commonly appears alongside weak fades and slices. The divot-line drill helped me reduce chunks and learn what a better divot pattern looks like. The ball-position test also exposed a problem in my setup: I used to play the ball too far forward. Moving it back improved both my contact and accuracy.
The seven drills below train three areas that make iron play more reliable:
- Contact: striking the ball near the center of the face with the low point after it
- Control: producing a repeatable swing length, tempo and carry
- Performance: transferring the motion to a target with your normal routine
If poor iron shots are one of the mistakes keeping you from breaking 90, use my free Break 90 Toolkit to identify your biggest scoring leaks and choose what to practice first.
How to Use These Iron Drills
Use a 7-iron for most of the session. It is long enough to expose contact and face-control problems without being as demanding as a long iron.
Do not complete all seven drills every time you visit the range. Start with the drill that matches your biggest problem, hit five to 15 focused shots and finish with the 10-ball green challenge.
Use this rule throughout the session: change only one variable during a set. If you alter ball position, posture and swing path together, you will not know which adjustment produced the result.
Drill 1: Divot-Line Low-Point Drill
This is one of my favorite ways to train ball-first contact because the ground gives immediate feedback.
When I worked on reducing my own chunked iron shots, the line made the mistake obvious. A divot beginning behind the ball meant the club had reached the ground too early. Better swings produced contact at the ball with the turf mark beginning on the target side.
Setup
- Use a designated grass practice area.
- Draw a straight line perpendicular to the target line.
- Place five balls directly on the line, spaced far enough apart to avoid previous divots.
- Use a pitching wedge or 9-iron first.
- Choose a target approximately 80–120 yards away.

How to Perform It
Make a controlled three-quarter swing. Your goal is to contact the ball before the turf and create the first visible part of the divot on the target side of the line.
Score each shot:
- 2 points: Solid contact and divot begins after the line
- 1 point: Playable contact and divot begins on the line
- 0 points: Turf contact begins behind the line
Try to score at least seven out of 10 before changing to a 7-iron. If the divots repeatedly begin behind the line, reduce the swing length and check that the ball is not too far forward.
For a deeper explanation of the swing bottom, read this guide to low-point control for crisp iron shots.
Drill 2: Tee-Gate Center-Contact Drill
Heel contact is common when I work with golfers who also fight a slice. The heel strike is not the only reason the ball curves—the clubface and path still matter—but it can add weak, fading flight and reduce the quality of contact.
The tee gate gives the clubhead a clear task without asking the golfer to manipulate the face during the downswing.
Setup
- Place a ball on short grass.
- Set one tee just outside the toe of the 7-iron and another just outside the heel.
- Begin with approximately one-half inch of clearance on each side.
- Apply impact spray or a face sticker if available.
- Choose a target at your normal 7-iron distance.
How to Perform It
Hit five shots without touching either tee. Check the face after every swing.
Your goal is four successful center-area strikes out of five. A ball only counts when the club misses both tees and contact finishes near the center of the face.
If you strike the outside tee near the toe of the clubhead, you are delivering the heel too close to the ball. Widen the gate slightly, check that your arms hang naturally and make smaller swings. Narrow the gate again after passing four out of five.
Golfers with a repeating heel pattern can also use this guide on how to stop hitting golf shots off the heel.
Drill 3: Feet-Together Tempo Drill
Swinging harder does not automatically produce better iron shots. When speed disrupts balance, the low point and strike pattern begin moving around.
Setup
- Use a 7- or 8-iron.
- Place your feet only a few inches apart.
- Position the ball near the middle of the narrow stance.
- Tee the ball very slightly if you are uncomfortable beginning from the turf.
- Choose a target at approximately 60–70% of your normal distance.
How to Perform It
Hit five smooth half- to three-quarter shots. Keep your feet planted and finish with your chest facing the target.
A shot counts when you make playable contact and hold the finish for three seconds. Pass the drill by completing four out of five.
If you lose balance, reduce the swing length. The purpose is rhythm and centered contact—not proving how far you can hit from a narrow stance.
Drill 4: Half-Swing Punch Drill
This drill removes unnecessary motion and helps you feel the relationship between body rotation, handle control and a compressed strike.
Setup
- Use a 7-iron.
- Play the ball near the middle or slightly forward of center.
- Use an athletic, shoulder-width stance.
- Choose a low target window approximately 100–130 yards away, adjusted for your normal distance.
How to Perform It
Swing the club back until the lead arm is roughly parallel to the ground. Turn through the ball and finish with the trail arm approximately parallel to the ground. The finish should feel abbreviated, but your body should continue rotating.
Hit five balls and score one point for solid contact and one point for starting inside your intended target window. Seven out of 10 points is the first goal.
Avoid forcing the hands forward or holding the face open. You are making a smaller golf swing, not manufacturing an extreme impact position.
Drill 5: Three-Position Ball Test
Ball position can quietly create contact and accuracy problems that golfers blame on their swings.
I learned this in my own setup. I used to let the ball move too far forward with my irons. Bringing it back improved where the club met the ball and made the starting direction more predictable.
This test helps you find your best starting position instead of assuming one location fits every golfer.
Setup
Use a 7-iron and create three marked ball positions:
- Your normal position
- One golf-ball width farther back
- One golf-ball width farther forward
Place an alignment stick perpendicular to the target line so the changes are measured rather than guessed.
How to Perform It
Hit five balls from each position for 15 total shots. Keep the target, alignment, tee conditions and swing intention the same.
Record:
- Center, heel or toe contact
- Heavy, solid or thin turf contact
- Starting direction
- Carry distance when available
Choose the position that creates the tightest contact pattern and most predictable start line—not the position that produces the single longest shot.
Use the complete ball-position-by-club guide to build reliable reference points throughout the bag.
Drill 6: Three-Distance Carry Ladder
Good iron play requires more than one stock distance. You also need to control carry when the target sits between clubs or conditions require a shorter swing.
Setup
- Use a 7-iron.
- Establish three carry zones at approximately 70%, 85% and 100% of your normal 7-iron carry.
- Use a launch monitor, range markers or estimated landing zones.
- Hit three balls to each zone, beginning with the shortest.
How to Perform It
Control the shorter carries mainly through swing length while preserving a smooth tempo. Do not make a full backswing and decelerate into the ball.
Award one point when the ball finishes inside the intended carry zone. Nine points are available; begin by trying to score six.
Repeat the ladder in reverse order after passing. Moving from long to short forces you to recalibrate instead of repeating progressively larger swings.
Drill 7: Ten-Ball Green Challenge
The final drill tests whether your improved contact can hold up when the target matters.
Setup
- Choose a green or target area at your stock 7-iron carry.
- Define a realistic green-width landing area.
- Spray the clubface if possible.
- Use your complete pre-shot routine before every ball.
How to Perform It
Hit 10 shots and change the exact aiming point every two balls. Record whether each shot finishes inside the target area.
Your goal is seven greens out of 10. Also record the strike location so you can separate a contact miss from a directional miss.
If you hit fewer than seven, identify the most common failure:
- Heavy or thin: return to the divot-line drill
- Heel or toe: return to the tee gate
- Poor start line: use the half-swing punch drill
- Correct direction but wrong carry: repeat the carry ladder
This is what turns a group of drills into a useful practice system. Your score tells you exactly where the next session should begin.
If you want the range, chipping and putting portions already organized for you, explore my step-by-step golf practice plans for beginner, intermediate and advanced golfers.
A Simple 30-Ball Iron Practice Session
Do not turn the seven drills into a two-hour mechanical marathon. Use this 30-ball structure:
- Five balls: Divot-line or tee-gate drill
- Five balls: Feet-together or half-swing drill
- Ten balls: Carry ladder or ball-position comparison
- Ten balls: Green challenge with full routine
Choose the drills from your current miss pattern. Save the complete 15-ball position test for a separate setup session, then use the winning position during future practices.
Common Iron-Practice Mistakes
Practicing Without Feedback
Watching ball flight is not enough. Use the turf, tees, impact spray, landing zones and scores to understand why the shot finished where it did.
Chasing Perfect Mechanics
A drill should improve a specific skill. It does not need to make your swing look like someone else’s swing.
Staying in Block Practice Too Long
Five repeated drill swings can build a feel. The 10-ball green challenge shows whether that feel survives a target, routine and score.
Judging the Best Shot
One pure 7-iron can hide nine poor swings. Judge the entire pattern and work toward the four-out-of-five standard.
Frequently Asked Questions
What is the best iron drill for ball-first contact?
Start with the divot-line drill. Place the ball on the line and try to begin the divot on the target side. It provides immediate feedback about where the club contacts the ground.
Which iron should I use for these drills?
A 7-iron is a useful starting club for most drills. Begin the divot-line drill with a wedge or 9-iron if you need an easier introduction, then progress to the 7-iron.
How many balls should I hit during iron practice?
Thirty focused balls can create a productive session. Use small scored sets instead of hitting a large bucket without changing targets or measuring results.
How do I know whether my iron contact is improving?
Track strike location, divot position, start direction and carry. Improvement should appear as a tighter pattern across several shots—not only a better feeling at impact.
Can the tee-gate drill fix a slice?
It can improve center contact when heel strikes accompany the slice, but it does not automatically correct the clubface or swing path. Use the gate to improve strike, then diagnose the remaining curvature separately.
Final Thoughts
Better iron play does not come from collecting more swing thoughts. It comes from knowing which skill failed and choosing a drill that gives you useful feedback.
Use the divot line to train ball-first contact, the tee gate to improve center strikes and the ball-position test to build a better setup. Add tempo, carry and target challenges so the improved motion transfers to the golf course.
Start with one five-ball drill and finish with the 10-ball green challenge. When you can repeatedly score four out of five on contact and seven out of 10 on the target test, your practice is becoming more consistent—not merely more comfortable.
For complete sessions with clear drills, repetitions and progress tests, choose the Foy Golf Academy practice plan that fits your current game.