How to Find Your Golf Club Distances With a 20-Ball Test
You may be missing greens because you do not know your golf club distances as well as you think. That one perfectly struck 7-iron that carried 170 yards is memorable, but if most of your 7-irons carry closer to 158–162 yards, treating it as your 170-yard club will leave you short again and again.
The solution is to stop estimating your yardages from your best shots. This 20-ball test will help you find your average carry, solid-strike carry, normal distance range, common miss, and actual reliability with every important club.
What You’ll Learn
- Why your longest shot is not your stock distance
- The difference between carry distance and total distance
- How to complete the 20-ball club-distance test
- How to grade contact and record shot direction
- Which numbers belong on your personal yardage chart
- How to adjust for wind, temperature, elevation, and lie
- How to use your real distances when selecting a club
How Do You Find Your Golf Club Distances?
The most reliable way to find your golf club distances is to hit multiple shots with each club while measuring carry distance, contact quality, and direction.
Hit 20 balls with one club using your normal on-course swing. Record the carry of every shot, grade the strike from 1–5, and mark whether the ball finished left, straight, or right of your target.
Do not base your club chart on one perfect strike. You need enough shots to reveal what normally happens when you use that club.
For each club, calculate or identify:
- Average carry for all 20 shots
- Average carry of solid strikes
- Normal carry window
- Longest and shortest useful carries
- Percentage of playable strikes
- Most common directional miss
These numbers tell you much more than simply saying, “I hit my 7-iron 170 yards.”
Your Best Shot Is Not Your Stock Yardage
Golfers naturally remember their longest shots. A flushed iron that carries farther than expected feels like proof that the club has gained a new distance.
The problem is that course management must be based on repeatable outcomes. If one ball carries 170 yards, four carry between 164 and 167, and the other 15 finish between 154 and 163, calling that club your 170-yard club creates poor decisions.
Your stock distance should represent a normal, solid strike—not the maximum distance you might produce once during a perfect range session.
This distinction matters most when the target has trouble in front. If a bunker begins at 162 yards and your best 7-iron carries 170 but your common range is 156–164, the club does not reliably remove the bunker.
Distance helps you score only when you understand how often you can produce it. Foy Golf Academy’s guide to how far you need to hit the ball to break 90 explains why usable distance matters more than maximum distance.
Carry Distance vs. Total Distance
Carry distance measures how far the ball travels through the air before its first bounce. Total distance includes everything that happens after the ball lands.
Use carry distance as the foundation of your club chart because hazards, bunkers, greens, and forced carries must be cleared through the air. Roll cannot help a ball that lands short in water or sand.
Total distance still matters on tee shots, punch shots, firm fairways, and approaches designed to release. However, rollout changes significantly with turf firmness, slope, trajectory, spin, and weather.
Record both numbers when your launch monitor provides them, but make club-selection decisions around carry whenever an obstacle must be cleared.
What You Need for the 20-Ball Distance Test
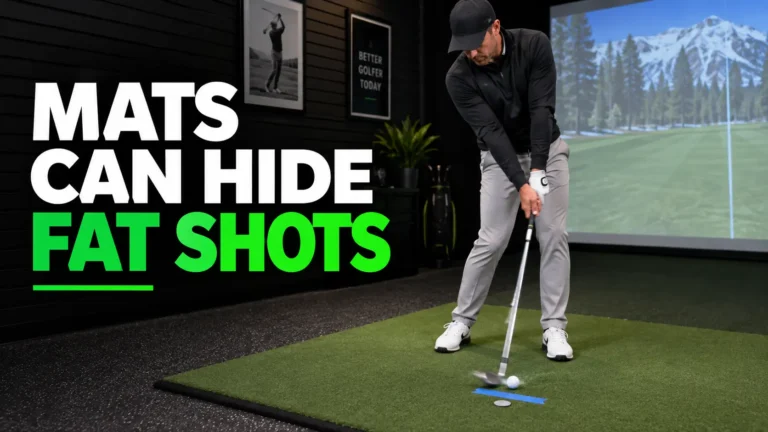
A portable launch monitor or indoor simulator makes the test much easier because it measures every carry. You can also use a practice area with verified target distances, although the final numbers will be less precise.
Bring:
- Your golf clubs
- At least 20 balls or one bucket of range balls
- A portable launch monitor or simulator
- A notebook, spreadsheet, or phone note
- One alignment stick
- A specific target
- Your normal golf shoes
Use the same model of golf ball when possible. Range balls can differ in condition and performance, so record which type of ball you tested.
Test during relatively calm conditions or write down the wind direction and approximate strength. The goal is not a laboratory-perfect measurement; it is a useful picture of the shots you normally produce.
How to Complete the 20-Ball Club-Distance Test
Testing every club in one session can create fatigue and careless swings. Begin with three clubs you use frequently, such as a wedge, 7-iron, and hybrid.
You can test another three clubs during your next practice. Continue until you have covered the important distance gaps throughout the bag.
Step 1: Warm Up Before Recording
Spend 10–15 minutes warming up before collecting data.
Begin with five short wedge shots. Follow those with five mid-irons, then three to five longer swings.
Do not record these balls. Your test should measure your normal swing after your body is ready—not the stiff swings from the beginning of the session.
Step 2: Choose One Specific Target
Pick a flag, stake, or virtual target that matches the club’s expected distance. Place an alignment stick on the ground parallel to your target line.
Complete your normal pre-shot routine before every ball. The test loses value if you rake balls into position and swing again before the previous shot finishes.
Use the same target for all 20 shots with that club. You want to see both the distance pattern and directional pattern around one intended line.
Step 3: Record Carry Distance
Write down the carry distance immediately after every shot.
If the launch monitor reports 162.4 yards, recording 162 is precise enough for this test. Do not round the result up to the distance you hoped to hit.
Keep every normal attempt in the initial data. A thin shot, heavy strike, heel strike, or toe strike is part of your current performance.
Step 4: Grade the Strike From 1–5
Place a contact score beside every carry distance:
- 5: Centered strike with the flight and feel you wanted
- 4: Solid strike with a small contact error
- 3: Usable shot with noticeable contact loss
- 2: Poor strike that would create a difficult result
- 1: Severe mishit such as a top, chunk, or shank
Be honest, but do not overanalyze the difference between every strike. The grading system simply separates your best contact from the shots you are likely to produce during a round.
A sample entry might read:
162 yards / Strike 4 / Slightly Right
After 20 balls, you will be able to see whether shorter distances were caused by poor contact or whether your normal carry was simply lower than expected.
Step 5: Mark Left, Straight, or Right
Record the finishing direction of each shot:
- L: Left of the target corridor
- S: Inside the target corridor
- R: Right of the target corridor
For an iron test, create a target corridor approximately 15–20 yards wide. Use two landmarks, range flags, or simulator boundaries to define it.
You can add more detail if useful, such as SL for slightly left or FR for far right. A basic three-column system is enough for most golfers.
Distance alone does not determine whether a club is dependable. A 7-iron that carries the correct yardage but misses right on 13 of 20 shots gives you important information about your aim, clubface control, and on-course target selection.
Step 6: Repeat Until You Have 20 Recorded Shots
Hit all 20 balls with your normal speed. Do not begin swinging harder to improve the numbers.
Take a short break after every five balls. Step away, check your notes, and restart your routine.
If fatigue clearly changes your motion, stop after 10 shots and complete the remaining 10 during another session. Accurate information is more valuable than finishing the test quickly.
Calculate the Numbers That Matter
One average does not tell the entire story. Create four useful distance numbers for each club.
All-Shot Average Carry
Add the carry distances of all 20 shots and divide by 20.
For example, if your 20 shots total 3,200 yards:
3,200 ÷ 20 = 160-yard average carry
This number reflects the overall result of your current swing, including ordinary contact mistakes.
Keep severe mishits in this calculation initially. If one topped ball traveled only 45 yards, note how strongly it affected the average rather than pretending it did not happen.
Solid-Strike Carry
Find every shot graded 4 or 5. Add those carry distances and divide by the number of qualifying shots.
Suppose 11 of your shots received a 4 or 5, and their combined carry was 1,815 yards:
1,815 ÷ 11 = 165-yard solid-strike carry
This is closer to your stock yardage, but it should not automatically become the only number on your chart.
Normal Carry Window
Look for the distance range containing most of your usable shots.
Your 7-iron might produce:
- All-shot average: 160 yards
- Solid-strike average: 165 yards
- Most usable shots: 157–166 yards
- Best strike: 170 yards
The normal carry window of 157–166 is more useful than the single 170-yard result. It shows the range you should expect when contact is not identical every time.
Playable-Strike Percentage
Count every shot graded 3, 4, or 5, then divide by 20.
If 16 shots were playable:
16 ÷ 20 = 80% playable strikes
You do not need to publish this number or compare it with another golfer. Use it to identify clubs that need more practice and situations where you need a larger safety margin.
Build a Useful Golf Club Distance Chart
Your completed chart should show more than one yardage.
| Club | All-Shot Average | Solid-Strike Carry | Normal Carry Window | Playable Strikes | Common Miss |
|---|---|---|---|---|---|
| 9-Iron | 126 | 130 | 124–132 | 18/20 | Slightly left |
| 7-Iron | 160 | 165 | 157–166 | 16/20 | Right |
| 5-Iron | 181 | 188 | 176–190 | 12/20 | Right |
| Hybrid | 198 | 202 | 194–205 | 17/20 | Slight fade |
These are example results, not target distances. Replace them with your own data.
The chart reveals more than club yardages. In this example, the 5-iron has a large distance window and only 12 playable strikes, while the hybrid travels farther and produces more predictable contact.
That golfer might choose the hybrid more often when the target requires a dependable carry. The 5-iron may need contact practice before it becomes a trusted on-course option.
Which Distance Should You Use on the Course?
Use the number that matches the shot in front of you.
When Trouble Is Short of the Green
Choose a club whose normal carry window clears the danger—not one that clears it only with your best strike.
If water ends at 158 yards and your 7-iron normally carries 157–166, the club brings the water into play. A 6-iron with a normal window of 168–177 may be the safer choice.
When the Green Is Open in Front
You can use the lower portion of your carry window when a short miss remains playable.
If the front of the green is open and your 7-iron usually carries 157–166, playing it from 160 yards may be reasonable. A slightly short shot can still finish near the green.
When Trouble Is Long
Avoid selecting a club based only on a short average if your solid strikes can reach danger behind the green.
If your average is 160 but your solid shots regularly carry 166, a back bunker beginning at 165 matters. Consider less club or aim toward an area where the long miss is safe.
When the Flag Is Near an Edge
Do not use a perfect yardage as permission to attack a dangerous flag.
Combine your carry window with your directional pattern. If your common miss is right and the flag sits beside a right bunker, aim farther toward the center of the green.
Why Strike Quality Belongs in the Test
Two golfers can average the same distance while having completely different patterns.
Golfer A might hit 20 shots between 157 and 164 yards. Golfer B might hit several shots near 170 and several near 145.
Both could produce an average close to 160, but Golfer A has a far more predictable club.
The strike score explains why the distances changed. If every shot graded 4 or 5 carries approximately 165 yards, but the shots graded 2 or 3 carry 150–158, contact is causing the distance problem.
That golfer does not need to swing harder. The priority should be improving low-point and center-face contact.
Foy Golf Academy’s guide to low-point control for crisp iron shots provides a logical next step when heavy contact is reducing your carry.
Adjust for Real On-Course Conditions
Your test creates a baseline. Conditions on the course determine how you adjust it.
Wind
A headwind, tailwind, or crosswind can change both distance and curvature. Avoid making one universal adjustment for every wind because the effect depends on shot height, ball speed, spin, and wind strength.
Identify the direction, choose a conservative target, and take more club into a headwind rather than swinging harder.
Temperature
Cold conditions can reduce the distance you normally expect from the ball and your body. Add margin instead of assuming your warm-weather yardages will remain identical.
Elevation
An uphill target generally plays longer, while a downhill target generally plays shorter. A rangefinder with slope can help during practice and casual rounds where permitted.
Lie
A clean fairway lie produces a different result from thick rough, a divot, or a sidehill lie.
From rough, consider whether the ball will come out cleanly, launch unexpectedly, or lose speed. Widen your expected distance window and aim toward the safest section of the green.
Adrenaline and Fatigue
Your swing speed and contact can change during a round. A pressured shot may travel farther, while a tired swing late in the round may produce less speed or poorer contact.
Do not force one exact number when your body and swing feel different from the test session. Use the chart as a starting point, then apply judgment.
Repeat the Test Across Several Sessions
One session gives you useful evidence, but it should not become a permanent verdict on your clubs.
Repeat the test during two or three practice sessions. Compare the averages, strike scores, and directional patterns.
If your 7-iron solid-strike carries are 164, 166, and 165 across three sessions, you have a dependable baseline. If they are 154, 167, and 160, investigate the changing conditions and contact before finalizing the number.
Retest after:
- A major swing change
- New irons, wedges, shafts, or golf balls
- A noticeable speed increase or decrease
- A long break from golf
- A change in normal ball flight
- Several rounds with repeated short or long misses
Wedge yardages should also include partial swings. The three-wedge distance system shows how to build additional carry numbers using controlled swing lengths.
A Three-Session Full-Bag Testing Plan
Do not hit 20 balls with every club in one exhausting practice. Divide the bag into manageable groups.
Session 1: Scoring Clubs
Test:
- Pitching wedge
- 9-iron
- 7-iron
Hit 20 recorded balls with each club. Rest briefly between clubs and check whether fatigue changes your contact.
Session 2: Approach Clubs
Test:
- 8-iron
- 6-iron
- 5-iron or hybrid
Use the same warm-up, target corridor, strike grading, and direction notes.
Session 3: Long Clubs
Test:
- Hybrid or fairway wood
- Secondary tee club
- Driver
Make the target corridor 25–35 yards wide for the longer clubs. Record carry, total distance, direction, and whether the result would remain playable.
This final session can connect directly to the Foy Golf Academy safe-club test for choosing the best club off the tee.
Frequently Asked Questions
How many shots should I hit to find my club distance?
Twenty shots per club creates a useful starting sample without making one session excessively long. Repeat the test on two or three different days before treating the results as permanent.
Should I include mishits when calculating average distance?
Include normal mishits in your all-shot average because they reflect your current performance. Also calculate a separate solid-strike average using shots graded 4 or 5 so you can distinguish contact problems from your stock carry.
Is carry distance or total distance more important?
Carry distance is more important when you must clear water, bunkers, rough, or the front of a green. Total distance becomes more relevant on tee shots, firm fairways, punch shots, and shots designed to release.
Do I need a launch monitor to measure golf club distances?
A launch monitor provides the clearest carry data, but it is not the only option. You can use a simulator, a measured practice area, or known range targets while accepting that the estimates may be less precise.
How often should I update my golf club distance chart?
Review it several times during the playing season and retest whenever your swing, speed, equipment, ball flight, or contact pattern changes noticeably.
Final Thoughts
Stop defining your golf club distances by the best shot you remember. Hit 20 balls, record every carry, grade the strike, mark the direction, and learn the difference between your average result and your perfect result.
Start with the three clubs you use most often. Once you know their real carry windows, you can choose targets and clubs with far more confidence instead of guessing over every approach shot.
Save your completed chart on your phone or keep a small card in your bag. If you want more structured tests and complete sessions that tell you exactly what to practice, use the Foy Golf Academy complete practice system