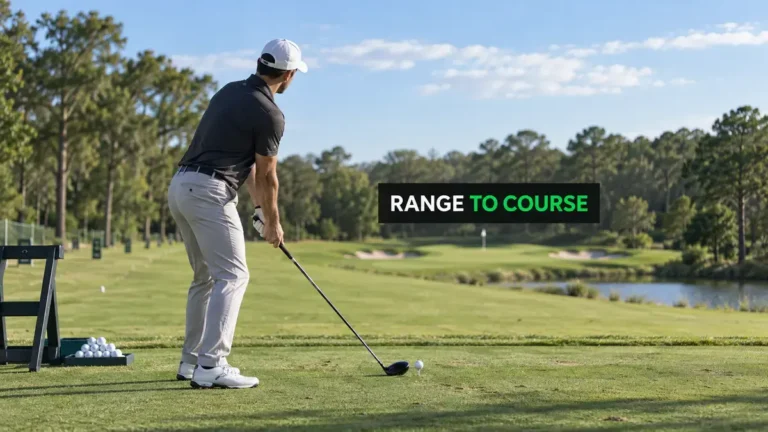

Golf Tee Box Tips: Where to Tee Up, How High, and How to Aim
A good tee shot starts before the club moves.
You need to choose the right tees, position the ball inside the legal teeing area, find a useful angle, and aim toward a target that fits the shot you intend to hit.
Those decisions sound basic, but they are easy to rush. A golfer can make a solid swing and still finish in trouble because the setup pointed toward the wrong part of the hole.
Before every tee shot, choose a sensible landing area, tee the ball inside the correct markers, set a suitable tee height, and align the clubface and body to your intended starting line.
Here is how to build that process into a routine you can repeat.
Choose Your Tees by Distance and Ability
Tee colors do not have a universal meaning.
White tees at one course may play a different role from white tees at another. Red tees are not automatically reserved for women, and the back tees are not automatically the right choice for men.
Look at the scorecard and the course’s recommendations.
Choose a set that suits your normal hitting distances, including your ability to carry hazards and reach landing areas. Your longest drive of the year is not a useful benchmark.
The USGA’s guidance on choosing suitable tees emphasizes matching the course length to the golfer rather than choosing tees because of expectations or peer pressure.
Ask yourself:
- Can I reach the fairway with a reasonably struck tee shot?
- Can I clear the required carries with room to spare?
- Do good shots give me realistic opportunities to reach greens in regulation?
- Will I use a variety of clubs during the round?
If most par 4s require a driver followed by your longest fairway wood—and you still cannot reach—consider moving forward.
Players in the same group can use different tees. You do not need to play from the same markers as the longest hitter.

Follow the selected tee setup
In a competition, use the tees assigned by the Committee.
For a normal round, follow the set you selected. If you choose an official combination tee setup, follow its hole-by-hole instructions on the scorecard. A combination setup may deliberately use different colors on different holes.
Understand the Legal Teeing Area
The entire closely mown tee box is not necessarily the legal teeing area.
Your teeing area is a rectangle defined by the two markers for the hole you are playing. Its front edge runs between the forward-most points of those markers, its side edges extend back from their outside edges, and it is two club-lengths deep.
A club-length is measured using the longest club you carry other than your putter.
The USGA’s teeing-area guide explains this distinction.
You have more room than the narrow strip immediately behind the markers. Use that space to find comfortable footing and a useful view of your target.
The ball is inside the teeing area when any part of it touches or is above the rectangle. Your feet may be outside it.
For a simple habit, place the ball comfortably inside the boundaries rather than trying to use the last fraction of an inch.
What if you play from outside the teeing area?
In standard stroke play, starting a hole from outside the teeing area brings two penalty strokes, and you must correct the mistake by playing from inside it. The original stroke and subsequent strokes with that ball before correcting do not count.
In match play, there is no penalty, but your opponent may promptly cancel the stroke and require you to replay from inside the teeing area.
Check the ball’s position before swinging, especially when the markers are staggered or the tee points away from the hole.
Resource: Grab these 50 practice templates… organized into Driving Range, Chipping, and Putting so you’re not guessing what to work on. Learn more on our home page.
Pick Your Landing Area Before Placing the Tee
Many golfers put the tee in the ground first and decide where to aim afterward.
I would reverse that order.
Stand behind the teeing area and study the hole. Identify where you want the ball to finish, then choose the club and starting direction that give you a reasonable chance of getting there.
Consider:
- Your normal carry distance
- Expected rollout
- Fairway width near the landing area
- Bunkers, trees, water, and out-of-bounds
- Wind and slope
- Your usual shot shape and misses
A bunker can be a useful visual reference, but aiming over one only makes sense if you can comfortably carry it under the conditions.
Do not build your plan around a perfect strike.
If tee shots regularly leave you taking penalties or punching sideways, use the free Shot Leak Audit and Break 90 Blueprint to identify whether club selection, targeting, or ball striking deserves your attention first.
Choose the Side of the Tee That Helps Your Shot
You do not have to tee the ball in the middle.
Moving across the legal teeing area changes your view of the hole and the angle toward your target. Sometimes one side gives you a clearer starting line past trees. Sometimes another makes your intended shot shape easier to picture.
Compare the options before choosing.
From the left side, can you see the landing area clearly? From the right side, does your normal flight have more room? Is one position noticeably flatter?
There is no rule that says every fade must be played from one side or every draw from the other.
For example, imagine a right-handed golfer who normally hits a modest fade. The useful tee position is the one that provides a clear starting line and enough room for that fade to finish safely. Trees, wind, and the fairway’s shape may change that choice from hole to hole.
Do not move the tee markers to create a better position. Work within the area they define.
Find Comfortable Footing
Once you have a useful angle, check the ground beneath your feet.
Look for a reasonably level stance. A small slope can affect balance, posture, and how the shot looks at address.
You can move backward within the two-club-length depth to find a better spot. There is no requirement to tee the ball immediately behind the front boundary.
Avoid choosing a poor stance just to gain an insignificant amount of distance.
Before pushing the tee into the ground, briefly stand where you expect to play. If the position feels awkward, choose another legal spot.
Set Tee Height for the Club You Are Using
Tee height should support the strike you want.
A driver, fairway wood, hybrid, and iron do not all need the same height.
Driver tee height
A useful starting point is to have roughly half the ball above the driver’s crown when the club rests on the ground.
The crown is the top of the driver head—not the leading edge near the bottom of the face.
Treat this as a starting reference. Check your impact pattern during practice and adjust if necessary.
A higher tee does not automatically produce more distance. If the height encourages an unsuitable strike or makes you change your swing to reach the ball, it may hurt the result.
Fairway woods and hybrids
Use a lower tee than you would with a driver.
Give the ball a clean lie while keeping it low enough for a normal, controlled strike. You should not need to scoop upward to reach it.
Irons
A low tee can lift the ball just above the grass and provide a consistent lie.
The goal is to preserve your normal iron contact. You do not need a driver-style tee height simply because the shot begins from a teeing area.
Separate Your Starting Line From Your Landing Target
Your intended starting line and finishing location may differ.
If you plan to hit a fade, you might start the ball to one side of the landing target and allow it to curve back. A draw requires its own planned allowance.
Choose both before stepping into the shot.
This prevents a common mistake: aiming at the center of the fairway while expecting a curve that takes the ball away from it.
Keep the plan realistic. Use the shape you can normally produce rather than attempting an unfamiliar shot because the hole looks intimidating.
Aim the Clubface First
Stand behind the ball and look along your intended starting direction.
Choose a small, existing reference point a few feet ahead of the ball, such as a discoloration in the grass. Do not place an object there to help you aim.
Walk into the shot and aim the clubface using that reference. Then set your feet and body.
For a basic square setup, your foot line should run approximately parallel to the intended starting line. For a right-handed golfer, that means the feet point along a line to the left of the ball’s line; for a left-handed golfer, the relationship is reversed.
Your feet and ball are on separate lines. They should not both be pointed directly at the same nearby spot.
Also check that your shoulders have not turned significantly away from your intended setup while you were looking at the target.
Don’t Let the Tee Markers Aim Your Body
Tee markers establish the legal starting area. They do not necessarily point toward your ideal target.
The shape of the teeing ground can also influence your eyes. A tee that angles toward rough or a bunker may make that direction feel square.
Ignore those visual suggestions when choosing your alignment.
Use the ball, your intermediate reference, and your distant starting target to establish your own line.
Correct alignment improves the setup, but it does not guarantee a straight shot. If the ball misses, you still need to consider strike location, clubface delivery, and swing path.
Practice Alignment at the Range
Alignment sticks are useful practice tools.
On the range, place one safely along your foot line, outside the club’s path. Compare that line with the starting target you chose for the ball.
Then practice removing the aid and rebuilding the same setup using an intermediate reference.
Do not lay a stick or club on the ground to help take your stance during a round. Under Rule 10.2b, removing the object after using it to take your stance does not avoid the penalty.
The purpose of practice is to develop an alignment routine you can use without the aid.
Build a Simple Tee-Shot Routine
Your decisions should happen before you settle over the ball.
Use this sequence:
- Confirm the correct markers.
- Choose the landing area and club.
- Plan your starting direction and normal shot shape.
- Find a comfortable position inside the teeing area.
- Set the appropriate tee height.
- Choose an intermediate reference and aim the clubface.
- Set your stance, take a final look, and swing.
If the target stops making sense once you address the ball, step away and reset. Trying to solve the decision while remaining bent over the ball usually makes the routine feel more difficult.
My pre-round routine guide can help you arrive at the first tee prepared to use this process.
Rehearse Five Different Tee Shots
During your next range session, practice five imaginary holes.
Choose a different landing area for each. One might have trouble left, another trouble right, and another a fairway that ends before your driver’s normal finishing distance.
Before every shot, complete the full routine. Give yourself one attempt, then move to the next hole.
Record two separate results:
- Did you complete the planned setup?
- Did the ball finish in a playable position?
That distinction helps you recognize whether the mistake came from preparation or execution.
You can make a sensible decision and still hit a poor shot. You can also hit a solid shot toward a poorly chosen target. Your practice should help you recognize both.
For structured sessions that combine setup, ball striking, and course-management decisions, explore the Foy Golf Academy practice plans. Build a tee-shot routine you can trust before adding another swing thought.